

| Genre: | General: Education |
| Publisher: | A.S.K. |
| Cover Art Language: | English |
| Machine Compatibility: | BBC Model B |
| Release: | Professionally released on Cassette |
| Available For: | Amstrad CPC464, BBC Model B & Spectrum 48K |
| Compatible Emulators: | BeebEm (PC (Windows)) PcBBC (PC (MS-DOS)) Model B Emulator (PC (Windows)) |
| Original Release Date: | 1st March 1986 |
| Original Release Price: | £14.95 |
| Market Valuation: | £2.93 (How Is This Calculated?) |
| Item Weight: | 64g |
| Box Type: | Cassette Single Plastic Clear |
| Author(s): | Chris Davies |
Variant Items
There is 1 other item featuring this same game (that we know about!). Click any of them for their details.
Active Auctions
Closed Auctions
Buy It
Unfortunately no-one is currently selling this item.
Auction Price Watch
Worried you're being ripped off? Closing prices on eBay can help you decide what a reasonable price is for a particular item.

A&B Computing
1st March 1986
Could go down very well with those who are creative and enjoy a challenge! Read Review
Full Instructions
In All ASK Programs
RETURN
Remember: Once you have typed in your response a program will not deal with it until you press the RETURN key.
ESCAPE
You can always return to the beginning of a program by pressing the ESCAPE key.
DELETE
You can rub out anything typed in, before the RETURN key is pressed, by using the DELETE key.
CTRL-S
All of our programs incorporate sound. There are various volume levels. Holding down the CTRL key and pressing the S will change the level. Keep pressing these keys until you are happy with the volume.
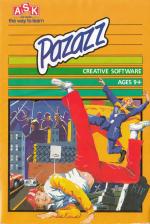
Pazazz brings the world of Entertainment to your computer, and puts you in the Producer's chair!
With Pazazz you can:
- design your scene
- compose your music
- create your performer
- control the action.
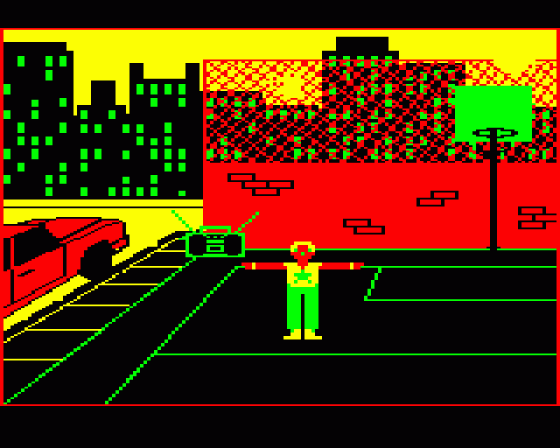
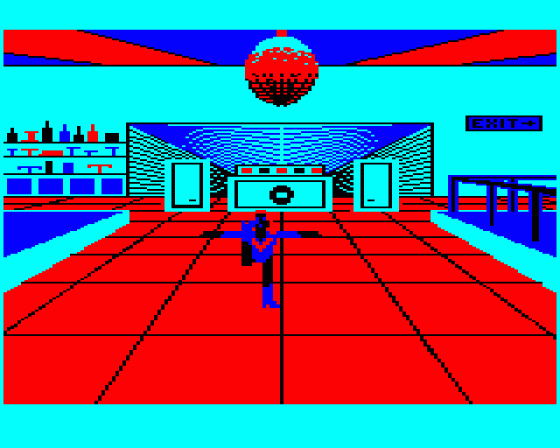
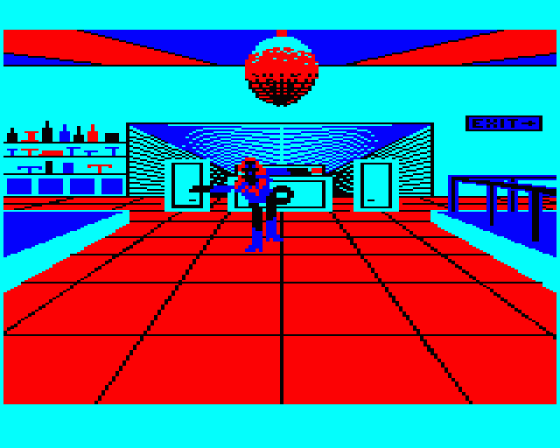
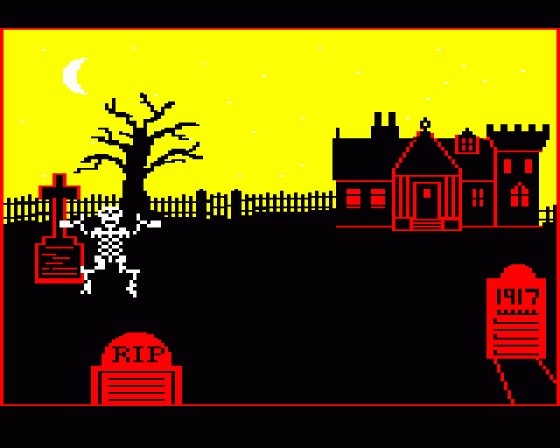
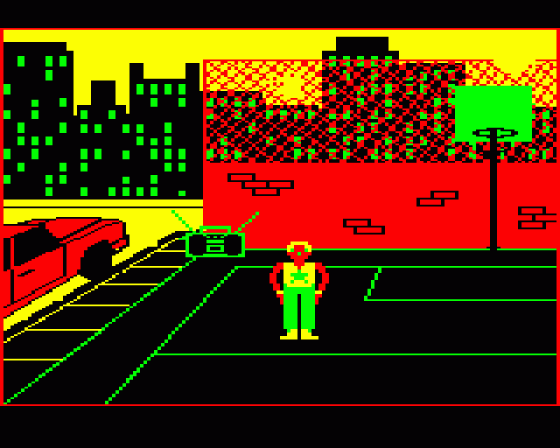
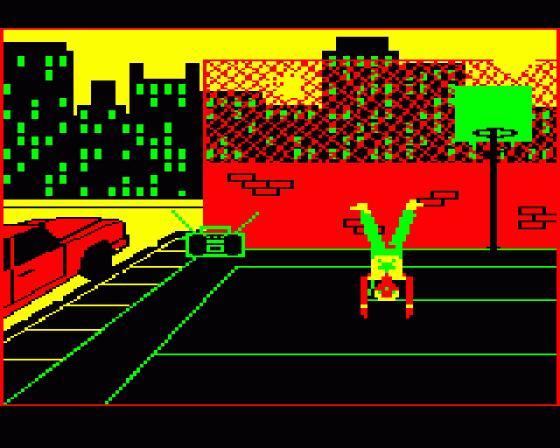
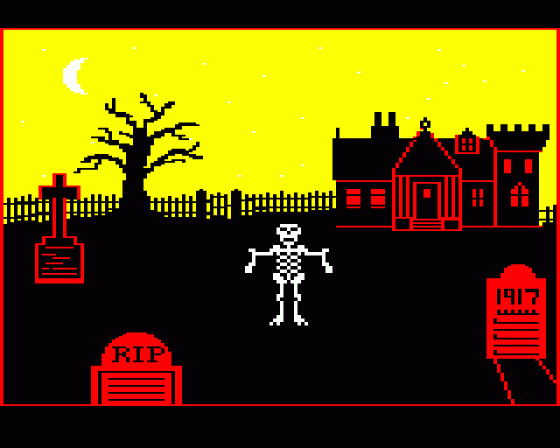
Using the pieces already supplied you can set your performance in a disco, a circus, a street-scene or a graveyard! Your figure can be a skeleton, a break-dancer, a disco-girl or a clown. When you start to design your own performance, the possibilities are limited only by your own imagination.
When you have created your performance, you can save it to tape or disc, and then use the separate parts in other performances.
Loading
Cassette:
- Switch on your computer, or, if you have been running another program, switch it off, wait a few seconds and switch it back on again.
- Put the cassette marked 'Programs' into the cassette unit, and rewind the tape if necessary. Check that the volume is at the right level. (You can do this with the Welcome tape that came with your micro).
- Type *TAPE and then press the RETURN key. Now type CHAIN"" and press the RETURN key. The message "Searching" will now appear on the screen.
- Press PLAY on the cassette unit.
- After a short pause a "Loading" message appears. Wait for about half a minute, and you should see a screen which tells you the title of the program and how long it will take to load.
- The program then loads, and you will hear an alarm signal when everything is ready.
Having Problems?
If the title screen does not come up in less than a minute, something is wrong. Go back and try the whole loading process once more. If the trouble continues, check all connections on your computer, the TV and the cassette unit. Then try the other side of your cassette.
Disc:
-
Switch on your TV, disc drive and computer, or, if you have been running another program:
a. Press the CTRL key.
b. While holding down the CTRL key press and release the BREAK key.
c. Release CTRL - Insert the disc into the drive with the label facing you, and close the door of the drive.
-
To load the program:
a. Press the SHIFT key.
b. While holding down SHIFT press and release the BREAK key.
c. Release the SHIFT key. - A title screen will appear within a few seconds. On this screen you will see a menu of four options. Press the key for the number of the option called 'Pazazz', (i.e. number 4).
- The program for the option you have chosen will load in a few seconds.
Watch A Complete Performance
There are four complete performances contained on your data tape or disc. They are called 'STREET', 'CIRCUS', "DISCO' and 'GRAVE'.
Follow the instructions below to load 'STREET' and watch it now, and you'll get a good idea of the exciting things you can do with Pazazz.
Cassette:
- Put the data cassette, marked 'Files' into the cassette unit and rewind the tape if necessary.
- The menu at the bottom of the screen will show MOVE LINKUP, with LINKUP highlighted. Press RETURN to choose LINKUP.
- The menu will show LOAD EDIT SAVE, with LOAD highlighted. Press RETURN to choose LOAD.
- The menu will show FIGURE Pazazz MUSIC, with Pazazz highlighted. Press RETURN to choose Pazazz.
- The computer will ask you to type in the name of the file. Type STREET and press RETURN.
- The message "Searching" will appear in the bottom half of the screen.
- Press the PLAY button on your cassette unit.
- The file will then load. As each section loads you will hear a beep, and the next section will begin to load automatically. It will take approximately 4 minutes to load a complete performance.
- As the last section loads, you will see graphics appearing on the screen, line by line. When the screen is complete, a figure will appear and the performance will begin.
- If you do not have remote control on your cassette player, STOP THE TAPE NOW.
Disc:
- The menu at the bottom of the screen will show MOVE LINKUP, with LINKUP highlighted. Press RETURN to choose LINKUP.
- The menu will show LOAD EDIT SAVE, with LOAD highlighted. Press RETURN to choose LOAD.
- The menu will show FIGURE Pazazz MUSIC, with Pazazz highlighted. Press RETURN to choose Pazazz.
- The computer will ask you to type in the name of the file. Type the filename STREET and press RETURN.
- The file will then load.
- When the last file has loaded the performance will begin automatically.
Problems?
If the files fail to load, check that you have the correct disc or cassette in place, and that it is the correct way up. (Press the ESCAPE key to escape from the loading procedure if you are using cassette.) If you still have a problem, go back through the procedure for loading the program, and then load the file.
When the performance has finished the program will return to the last menu, which shows: FIGURE Pazazz MUSIC.
TO WATCH ANOTHER PERFORMANCE choose Pazazz, type the name of the performance you want to see (CIRCUS, DISCO or GRAVE) and press RETURN. Cassette users should then press PLAY on the cassette unit. (If you have remote control on your cassette player, it will PLAY automatically when you press RETURN.)
Note: Cassette users should watch the performances in the order CIRCUS, DISCO, GRAVE so that the tape is positioned at the start of a new performance after loading the last one.
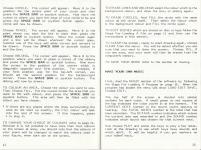
How To Use Pazazz
 |
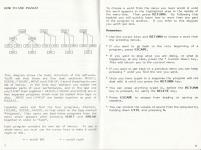
This diagram shows the basic structure of the software. You'll see that there are five main sections: MUSIC, SCENE, FIGURE, MOVE and LINKUP. Each of these has its own set of menus. In the first four sections you create the separate parts of your performance, and in the last one you 'LINK' them together. MUSIC, FIGURE and SCENE are in fact separate programs which must be loaded from tape or disc. MOVE and LINKUP are loaded together as part of Pazazz.
Cassette users will find the four programs, Pazazz, FIGURE, SCENE, MUSIC, in that order on the tape marked 'Programs'. Disc users can load these programs from the menu which appears after pressing SHIFT and BREAK together in order to "boot".
Each program contains its own set of menus. To see a whole menu you must use the cursor keys to make it scroll right or left.
Arrow left/right - Scroll left/right
To choose a word from the menu you must scroll it until the word appears in the highlighted area in the middle of the menu-line. Then press RETURN. By following this booklet you will quickly learn how to move from one part of the program to another. If you refer to this diagram you won't get lost.
Remember:
- Use the cursor keys and RETURN to choose a word from the scrolling menus.
- If you want to go back to the very beginning of a program, press ESCAPE.
- If you want to stop what you are doing, or what is happening, at any time, press the + (cursor down) key. This will return you to the current menu.
- If you want to get back to a previous menu you can keep pressing + until you find the one you want.
- Once you have typed in a response the program will not deal with it until you press the RETURN key.
- You can erase anything typed in, before the RETURN key is pressed, by using the DELETE key.
- Press ESCAPE to escape from loading or saving on cassette.
- You can control the volume of sound from the computer by holding down CTRL and pressing S.
Mix 'N Match Your Own Performance
Exploring The Files
Each complete performance has a file for MUSIC, MOVEment, SCENE and FIGURE. These can be loaded separately from within each of the four sections of the program. For example, if you want to load the MUSIC file for 'CIRCUS you would first load the program for the MUSIC section, then choose LOAD, and type 'CIRCUS' for the name of the file. Here are the steps you should follow.
Note: Cassette users will find it much easier to work with Pazazz if they first make an index of where the various programs and data files are stored on the tape. To do this, rewind the tape and set the counter on your cassette player to 000. Type *TAPE and press RETURN. Then type LOAD "*" (with the quotation marks) and press RETURN. The message "Searching" will appear. Press PLAY on the cassette player. The computer will then search through the tape, and the names of the files which it finds will be displayed on the screen, as it finds them. Various filenames will appear. On the program tape you need only look out for 'Pazazz', 'FIGURE', 'SCENE' and 'MUSIC'. On the data tape you should index all of the files, as listed in the Index Sheet at the back of this book. (You will also see some numbers, but you can ignore them). As soon as each new file name appears on the screen, stop the tape, write down the name of the file (e.g. M.STREET) and the number on the tape counter, and then press PLAY on the cassette player. Keep on doing this, ignoring any error messages (e.g. "Data?"), until you come to the end of the tape. Although this takes quite a long time to complete, it is well worth the effort, as it will make your life much easier in the long run!
The steps for loading a program are as follows:
Cassette:
- Put the tape marked 'Programs' into the cassette unit.
- Wind the tape to a point just before the start of the section you require. (See above for how to index your tape).
- Press CTRL and BREAK together.
- Type *TAPE and press RETURN. Then type CHAIN and the name of the program you wish to load in quotes. For example, to load the MUSIC program you would type CHAIN "MUSIC". Then press RETURN.
- The message "Searching" will be displayed. Press PLAY on the cassette unit. The program will then load.
Disc:
- Hold down SHIFT and press BREAK. The screen will display a menu of the four programs (SCENE, MUSIC, FIGURE and PAZAZZ).
- Press a key for the number of the program you wish to load. This program will then load.
Cassette And Disc:
When the program has loaded, you will see the first menu. Now follow the steps given below.
The steps for loading a file are as follows:
Music And Figure
- If you have loaded the programs for MUSIC or FIGURE, the menu will show LOAD EDIT SAVE. Choose LOAD.
- If you are using cassette, put the tape marked 'Files' into the cassette unit and wind the tape to the approximate start of the file you wish to load. (See the section on FILES). Choose LOAD.
- Type the name of the file: STREET, CIRCUS, DISCO or GRAVE. Press RETURN.
- If you are using disc, the file will now load.
- If you are using cassette, the screen will display the message "Searching". Press PLAY on the cassette unit.
- When the file has loaded you will see the menu which shows LOAD EDIT SAVE. Choose EDIT.
If you have loaded a FIGURE file, the figure will now be displayed.
If you have loaded a MUSIC file choose LISTEN from the menu which now appears. You will be asked 'Do you wish to hear the other voice?! Choose YES. The music will then play, with both voices.
Scene
- If you have loaded the program for SCENE, you will be asked to select KEYBOARD or JOYSTICK from the menu. You can use either in this section.
- After you have chosen keyboard or joystick control, the menu will show LOAD EDIT SAVE. Follow the steps listed for MUSIC and FIGURE above.
- When the file has loaded, choose EDIT and the scene will be displayed.
Move
- To load a MOVE file you should first load the program for Pazazz. The menu will show MOVE LINKUP. Choose MOVE.
- The menu will show LOAD EDIT SAVE. Choose LOAD.
- Follow steps 2 to 5 for MUSIC and FIGURE above.
- When the file has loaded, choose EDIT.
- You will be asked whether you wish to load a scene.
- Choose YES from the menu. Then type the name of the scene, and press RETURN. (Note: Cassette users must first wind the 'Files' tape to the correct position for the start of the scene file. After pressing RETURN, press PLAY on the cassette unit)
- The scene will now load.
Choose WATCH from the menu which now appears. The sequence of movements will then be performed. A dummy! figure is built into the software so that you can see the movements.
When you are ready to load another file, follow these steps again.
Mix 'N Match
Try mixing the files so that the clown is break-dancing to disco music in the graveyard.
When you have decided which files you wish to mix together, follow these steps. Note: throughout this sequence, cassette users should follow the procedure for loading a file, as described under MUSIC and FIGURE on page 11.
- Load the program for the Pazazz section.
- Choose MOVE from the menu which appears, and then choose LOAD.
- Type the name of the file you wish to load, and press RETURN.
- When the file has loaded the menu will show LOAD EDIT SAVE. Press the (cursor down) key once. Choose LINKUP, and then choose LOAD. Then choose FIGURE.
- Type the name of the FIGURE file you wish to load, and press RETURN.
- When the file has loaded choose MUSIC, and then type the name of the MUSIC file you wish to load. Press RETURN.
- When the file has loaded, press the down arrow key once. The menu will show LOAD EDIT SAVE.
- Choose EDIT. You will be asked whether you wish to load a scene. Choose YES from the menu.
- Type the name of the SCENE to be loaded, and press RETURN.
- When the scene has loaded, choose Pazazz from the menu.
- Your mixture of files will now be performed.
To see the performance again, choose GOTO and type 0 to reset the sequence to the beginning. Then choose Pazazz.
Polishing Your Performance
With SYNCH (synchronise) you can match the movements to the music.
First you must reset the movements to the beginning by choosing GOTO and typing 0. Then choose SYNCH. Press < or > to start the music, and then keep pressing either of those keys to move the figure into the next position in time with the music. If you want to stop synchronising before the end of the sequence, press the down arrow key.
When you have finished synchronising the movements you can watch the results by choosing GOTO, typing 0, and then choosing Pazazz.
If you want to start synchronising from somewhere in the middle of the sequence, simply choose GOTO and type the number of the frame you want to start with, instead of 0.
You can slow down the music while you synchronise the movements. First choose TEMPO from the menu. The new menu will show 1 2 3 4. By choosing one of these you can make the speed of the music two, three or four times slower than the original. You must choose 1 to reset the music to its original tempo when you have finished synchronising.
If you are pleased with your mixture of files you can save it as a whole performance, or you can just save the MOVE file with the changes you have made. The section about Saving Files tells how to do this. You can, of course, mix in match your own original music, movements, scenes and figures in this way.
Original Creations
Make Your Own Figure
First, load the FIGURE section of the software by following the Steps for Loading A Program on page 10. When the program has loaded, the menu will show LOAD EDIT SAVE. Choose EDIT.
THE FRAMEWORK for the figure will appear on screen with a small flashing cursor inside the frame. Move the flashing cursor around the frame with the Z, X, : and / keys. The small marks inside the frame are the joints for each moveable body part. Your design must cover these joints if you want your limbs to be connected to each other. As you design your figure, a replica will appear on the right of the frame in its actual size.
TO DESIGN A FIGURE move the cursor to the point where you want to start your design. Press the SPACE BAR to fill in a small square. Move the cursor around the frame, filling in squares with colour. Choose your colour from the menu.
If you want to save time while you're designing, you can make the right half of your design exactly the same as the left half. Simply choose MIRROR from the menu. But be careful! The left side will be copied onto the right side. If you leave the left side blank and then choose MIRROR, you'll lose everything.
You can design your figure in up to four colours. There are four colours on the menu to start with, but you can change these by choosing from a further four.
TO CHANGE A COLOUR, first choose the one you want to change. Then choose NEWCOL (new colour). The menu will show the 4 colours from which you can select your new one. Choose your new colour. The menu will now include your new colour in the 'paletter of four.
One of these is the BACKGROUND colour. Later, when you put your figure into a scene, this colour will become 'transparent'. Anything you have drawn in that colour will disappear, and the colours of the scene will show through. By swapping your colours around you can have any background colour you like from the total choice of 8.
The strip of colour below the scrolling menu is the colour that is currently in use. Whenever you choose a colour, the strip will change.
TO EDIT A FIGURE which is already stored on disc or tape follow the Steps For Loading A File on page 1l and then use the instructions in this section.
TO CLEAR the memory ready to start a new figure, choose CLEAR from the menu. You will be asked whether you are sure that you want to CLEAR the existing figure. If you are sure, choose YES from the menu. The figure will then be erased from the computer's memory.
TO SAVE YOUR WORK, refer to the section on Saving.
Make Your Own Movements
First, load the Pazazz section of the software by following the Steps For Loading A Program on page 10. When the program has loaded the menu will show MOVE LINKUP.
You can now either use the 'dummy' figure in the program, or load another figure, in order to carry out your movements.
TO LOAD ANOTHER FIGURE, choose LINKUP, and then choose LOAD. Then choose FIGURE. (Cassette users should put the 'Files' tape in the cassette and wind it to the start of the file which is to be loaded.) Type the name of the FIGURE you wish to load, and press RETURN. Cassette users must now press PLAY on the cassette unit. When the file has loaded, press the arrow twice.
If you are going to use the 'dummy', or have loaded another figure, you should now choose MOVE. The menu will show LOAD EDIT SAVE. Choose EDIT. You will be asked whether you wish to load a scene. If you choose YES, follow the instructions for loading a scene, given on page 11.
When you have chosen YES or NO, the screen will show the figure which you have chosen, against either a blank background or the scene you have chosen.
There are 2 numbers at the top of the screen. The number on the left is the current frame or movement. The number on the right is the total number of frames or movements that have been recorded. When you start from scratch, both numbers will be 0. You can have up to 800 frames (1-800).
TO CHANGE THE POSITION OF THE FIGURE you must first select BODY from the menu. Then press RETURN until the part you require is flashing. Now choose ROTRGT OR ROTLFT. Each time you press RETURN the part will rotate slightly. If you rotate an upper limb, the lower limb will 'lock' and rotate with it.
TO MOVE THE WHOLE FIGURE left, right, up or down use the Z, X, : and / keys.
TO RECORD A POSITION, press the SPACE BAR. The number of the frame which you are working on and the number of frames that you have recorded will both increase by one. You need to record several frames to make a complete movement.
TO WATCH the movements that you have created, choose GOTO, and type 0. This will set your sequence to the start. (The number of frames recorded will not change.) Then choose WATCH, and your figure will perform the movements.
You can go slowly through the sequence by choosing FORWRD (forward) or BCKWRD (backward). Each time you now press RETURN you will move forwards or backwards through the sequence by one frame.
TO CHANGE A FRAME choose GOTO and enter the number of the frame you want to change. Now change the position of the figure for this frame, and record it by pressing the SPACE BAR. The new frame will be inserted after the old one. The numbers at the top of the screen will increase by one. You must now get rid of the old frame. Choose BCKWRD to get to the old frame and then choose DELETE. The unwanted frame will be removed, and the total number of frames will decrease by one.
TO DELETE A FRAME choose GOTO and enter the number of the frame you want to delete. Then choose DELETE. The total number of frames will decrease by one.
TO INSERT A FRAME choose GOTO and enter the number of the frame after which you wish to insert a new frame. Now create your new frame and press the SPACE BAR to record it. The new frame will be inserted in the position after the number you entered for GOTO, and any frames after that number will be moved upwards. The total number of frames and current frame number will increase by one.
COPY lets you copy a section of frames from anywhere in your sequence and in sert it somewhere else, or add it on to the end. First decide where you want to put the section that you are going to COPY. Then GOTO the number of that frame.
Choose COPY. You will be asked whether you want to COPY a file from disc or tape (i.e. one which is not already in memory). TO COPY frames from the file you are working on, select NO to answer this question.
Enter the number of the first frame in the section you want to copy. Then enter the number of the last frame in the section you want to copy. The section between these two frames will now be inserted after the frame which you selected with GOTO (i.e. your current frame). Any frames after your current frame number will be moved to the end of the section which has been copied. The current frame number and the total number of frames will also increase.
TO COPY A SINGLE FRAME, just enter the number of that frame for both the start and finish of the COPY section.
TO COPY FROM ANOTHER FILE choose YES when asked whether you wish to COPY from a file on disc or tape. Then enter the name of the file you want to COPY from. (Cassette users must make sure that the 'Files' tape is in the cassette unit, and has been wound to the approximate starting point of the file which is to be copied, and Press PLAY on the cassette player.) The file will then be added on to the end of the existing sequence, and you can copy sections from one part to another, insert, delete or change frames, just as you would with any other sequence.
If the combined number of frames in the two files is more than 800 the extra frames will not be added and you will be given the message 'TOO MANY FRAMES'. You will therefore need to plan ahead to avoid having too many frames in memory when you want to load a section from another file. Think about any sections you might need, and load them in before you begin. Then you can DELETE what you don't need and COPY the section to the required position in the new sequence.
TO EDIT A MOVE file which is already stored on discor tape follow the Steps For Loading A File on page 11 and then use the instructions in this section.
TO CLEAR the memory ready to create a new sequence of movements, choose CLEAR from the menu. You will be asked whether you are sure that you want to CLEAR the existing sequence. If you are sure, choose YES fom the menu. The movements will then be erased from the computer's memory.
TO SAVE YOUR WORK refer to the section on Saving.
Make Your Own Scene
First, load the SCENE section of the software by following the Steps for Loading a Program on page 10. When the program has loaded you will be asked to choose KEYBOARD or JOYSTICK control. Make sure you already have a joystick connected if you choose JOYSTICK otherwise you will have to press BREAK and re-load the program.
The menu will now show LOAD EDIT SAVE. Choose EDIT.
You should now practise a few things before you try to draw a scene.
Choose LINE. A cross will appear. This is the cursor. Use the Z, X, : and I keys, or the joystick, to move it to the point where you want your line to start, then press the SPACE BAR or joystick button. A small square will mark the beginning of your line. As you move the cursor, in any direction, it will trail a straight line as it goes. When you are satisfied with the length and position of the line, press the SPACE BAR or joystick button again. This fixes the line in place.
Remember:
- The SPACE BAR or joystick button will always start and finish a procedure, such as drawing a line.
- You can speed up the movement of the cursor by holding down the SHIFT key.
Choose CIRCLE. The cursor will appear. Move it to the position for the centre point of your circle and then press the SPACE BAR or joystick button. Now move the cursor to where you want the edge of your circle to be and press the SPACE BAR or joystick button again. The circle will now be drawn.
Choose TRACE. The cursor will appear. Move it to the point where you want the line to start then press the SPACE BAR or joystick button. Move the cursor again and a line will be drawn wherever the cursor goes. Careful use of the keys will allow curves and corners to be drawn. Press the SPACE BAR or joystick button to end the line.
Choose OBLONG. The cursor will appear. Move it to the position where you want to place a corner of the oblong and press the SPACE BAR or joystick button. Now move the cursor to the position of the corner which is diagonally opposite your first position. For example, if your first position was for the top-left corner, you should set the second position for the bottom-right corner. Press the SPACE BAR or joystick button. The oblong will now be drawn.
TO COLOUR AN AREA. Choose the colour you want to use. Then Choose FILL. Put the cursor inside the area that you want to fill with colour, and press the SPACE BAR or joystick button. The area will then be filled with the colour you have chosen.
1. If there are any places where the lines surrounding the area do not meet up exactly, the FILL colour will leak into the rest of the screen. If this happens, press + to stop it.
TO CHANGE YOUR CHOICE OF COLOURS refer to page 16. Because it is not possible to have more than four colours on the screen at once, you should note that the colours of your scene will be changed to match the colours used in your figure, when both are on the screen.
TO ERASE LINES AND OBLONGS select the colour which is the background colour, and draw the line, or oblong again.
TO ERASE CIRCLES, first FILL the circle with the same colour as the circle itself. Then select the colour which is the background colour and FILL the circle again.
TO EDIT SCENES which are stored on disc or tape follow the Steps For Loading A File on page 11 and then use the instructions in this section.
TO CLEAR the screen, ready to start drawing again, choose CLEAR from the menu. You will be asked whether you are sure that you want to clear the screen. Choose YES, if you are sure, and your work will then be erased from the computer's memory.
TO SAVE YOUR WORK refer to the section on Saving.
Make Your Own Music
First, load the MUSIC section of the software by following the Steps For Loading A Program on page 10. When the program has loaded the menu will show LOAD EDIT SAVE. Choose EDIT.
The top half of the screen is divided into similar sections for each voice. A small green or red square at the top indicates the voice you're in at the moment. The CURRENT NOTE number is the sound you're playing or hearing. The TOTAL NOTES number is the total that has been recorded. The OCTAVE number indicates which octave the current note was recorded in and the SOUND number indicates which sound was chosen for that current note.
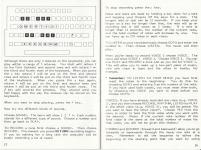
Now choose PLAY and press the keys to play a few notes. Look at the drawing to see which keys have sounds and which don't. It will be helpful if you put markers on your 'silent' keys.
 |
Although there are only 2 octaves on the keyboard, you can play within a range of 5 octaves. You start with octave 2 on the first (bottom) and second rows and with octave 3 on the third and fourth rows of the keyboard. When you press the : key octave 3 will be put on the first and second rows and octave 4 will be put on the third and fourth rows of the keyboard. When you press the : key again, octave 4 will be put on the first and second rows and octave 5 will be put on the third and fourth rows. The I key will reverse the process. Play around until you feel happy with the way the octaves can be moved on the keyboard.
When you want to stop playing, press the key.
Now try the different kinds of sounds.
Choose SOUND. The menu will show 1 2 3 4. Each number stands for a different type of sound. Choose a number and then go back to PLAY. TO RECORD a tune first choose a SOUND. Then choose RECORD. The moment you press RETURN recording begins. If you do nothing for a long time the computer will be busily recording a lot of rests!
To stop recording press the down arrow key.
Notes and rests are made by holding a key down for a note and keeping your fingers off the keys for a rest. The longest note or rest can be 12 seconds. If you keep your finger on a key for longer than that, the note will go on sounding but it will count as 2 notes. If a rest is longer than 12 seconds, the number of the current note, and the total number of notes will increase by one. You can have up to 255 notes in each voice.
TO LISTEN to your recorded music choose GOTO and enter the number 0. Then choose LISTEN. The music will then play.
When you're ready to record VOICE 2 choose VOICE. The menu will show VOICE 1 VOICE 2. Choose VOICE 2. You can now PLAY and RECORD a tune just as you did for VOICE 1. This will allow you to make up a two-part piece of music, with one voice in bass and the other in treble, for example.
Remember: TO LISTEN TO YOUR MUSIC you must first reset the notes to the beginning. You do this by choosing GOTO and entering O as the number of the note. If you have used both voices, you must reset them both, by choosing the VOICE you want to reset before you choose GOTO.
VOICES: If you have already recorded one voice (e.g. VOICE 1), and you then choose RECORD, RHYTHM, LISTEN or PLAY in the other voice (e.g. VOICE 2), you will be asked: 'Do you want to hear the other voice?'. Choose YES from the menu in order to hear the first voice while you work with the second. (Note: If the current note number of the first voice is the same as the total number of notes for that voice, you will not be given this choice.)
FORWRD and BCKWRD (forward and backward) allow you to go forwards or backwards through the music one note at a time. Remember to set the sequence to either the beginning or the starting point that you want by using GOTO. Then choose FORWRD or BCKWRD from the menu. Keep pressing RETURN for every note you want to hear.
After you have recorded a tune you can make some changes to it.
TO CHANGE THE RHYTHM choose GOTO and enter the number 0. Then choose RHYTHM. If you have recorded in both voices choose YES or NO to answer the question 'Do you want to hear the other voice?'. Then press the < or >key to start the music. Press the < or > key each time you want to make the next sound. If you do nothing for more than 12 seconds, the program will automatically count on to the next note or rest.
TO HAVE A BEAT while you're playing choose BEAT. The menu will show 1 2 3 4 5 6 7 OFF. 1 is the slowest beat and 7 is the fastest. Choose a number. If you want to turn off the beat choose OFF. Then press the key to go back to the previous menu.
It is helpful to have a CUE, i.e. a lead-in of a few beats, especially if you're going to record in 2 voices. This will also help you to synchronize the movements of your figure to the music. First set a BEAT and then choose CUE. The menu will show 1 2 3 4 5 6 7 OFF. These are the number of beats in the cue, or lead-in. Choose a number. Now choose RECORD and answer YES or NO to the question 'Do you want to hear the other voice?' The cue will then start to count down. It is shown by a small number at the bottom of the screen. Recording begins after 1. The speed of the count-down is set by BEAT.
TO DELETE A NOTE, GO TO that note and then choose DELETE. The note is deleted and the total number of notes will decrease by one. Every time you press RETURN another note will be deleted.
TO INSERT A NOTE choose GO TO and enter the number of the note after which you wish to insert a note. Choose RECORD and play the note. Then press the key to stop recording. The new note will be inserted after the position you chose with GOTO, and any notes after it will be moved upwards in the sequence. The total number of notes and the number of the current note will both increase.
TO CHANGE A NOTE, first DELETE it, and then choose BCKWRD. Then choose RECORD and play the new note.
TO REPEAT A SECTION of notes choose COPY. Enter the number of the first note in the section you want to copy, and then press RETURN. Enter the number of the last note in the section then press RETURN. This section will now be repeated after the current note and added to the total number. You can have up to 255 notes.
TO EDIT MUSIC which is already stored on disc or tape follow the Steps For Loading A File on pagell and then use the instructions in this section.
TO CLEAR the memory, ready to record a new piece of music, choose CLEAR and then choose YES to answer the question 'Are you sure?'. This will clear VOICE 1. Now choose VOICE, and select VOICE 2 from the menu which appears. Choose CLEAR again, and then answer YES to the question 'Are you sure?'. You have now cleared the old music file from the computer's memory.
Remember: There are two voices. CLEAR works only for the VOICE which you are currently using.
TO SAVE YOUR WORK refer to the section on Saving.
Your Own Complete Performance
When you have created and saved a new file for each section you can see the whole performance.
Follow the instructions for watching a complete performance on page 5. Note: when you type the filename, use the name of your new work instead of 'STREET'.
You may want to SYNCHronise the movements to the music. Instructions for doing this are on page 14.
You can of course go back to any of the four sections of the program and change what you have done.
If you want to save these files, individually or as a whole performance, refer to the section on Saving.
Saving Files
To Save a Whole Performance
Note: To save a whole performance you must be in the Pazazz section. Press the + (cursor down) key until the menu shows MOVE LINKUP. Choose LINKUP. The menu will show LOAD EDIT SAVE.
Choose SAVE. Decide what you want to call the file. Then type the name and press RETURN.
Now you must load the scene which is to be saved as part of the whole performance. If you are using tape, put the tape which contains the scene you require into the cassette unit, and wind it to the approximate start of the scene file.
Type the name of the scene that you wish to load, and press RETURN. The scene will appear on the screen as it is loaded.
If you are using CASSETTE the message "Press RECORD and then RETURN" will then appear. Make sure that you have a blank C30 tape in the cassette unit, rewind it to the start, and set your tape counter to 000. Then press RECORD and PLAY on the cassette unit and RETURN on the keyboard. The first of the files for the performance will then be saved. You will see block numbers scrolling on the screen as this happens. When the file has been saved the last number will be followed by the message "Press RECORD and then RETURN".
This will happen as each file is saved, and will allow you to check that you have enough space on your tape for the next file. Change tapes if necessary. Note the number on your tape counter for future reference. When you are ready to save the next file, simply press RECORD and PLAY on the cassette unit and RETURN on the keyboard. There are in fact five files to be saved. (See the section on "Files', below).
If you are using DISC, the files will be saved automatically.
When the performance has been saved you will be returned to the LOAD EDIT SAVE menu.
To Save Individual Files:
Press the + (cursor down) key until the menu shows LOAD EDIT SAVE. Choose SAVE, and decide what you want to call the file. Note: if you intend to load four files as a single performance later on, you must save them with the same filename. Type the name and press RETURN.
If you are using CASSETTE, make sure that you have a blank C30 tape in the cassette unit. Rewind it and set your tape counter to 000. Then wind forward to the place on the tape where you want to save the file, and make a note of the number on the tape counter for future reference. The message "Press RECORD and then RETURN" will appear on the screen. Press RECORD and PLAY on the cassette unit, and RETURN on the keyboard. You will see block numbers scrolling on the screen as the file is saved.
When the file has been saved, you will be returned to the menu.
Error Messages
If you are given any error messages when using disc, please refer to the User's Manual which accompanies the disc drive. You can press any key to return to the menu after an error message has been displayed.
Files
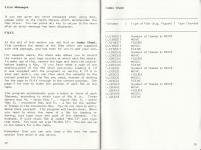
At the end of this section you will find an Index Sheet. This contains the names of the files which are supplied with this package, and has room for you to add your own.
For cassette users, the sheet also allows you to record the number on your tape counter at which each file starts. To make use of this, rewind the tape and reset the counter before loading a file. If you have made a note of the starting point of the file when previously loading it (if it was supplied with the program) or saving it (if it is your own work), you can then wind the cassette to the correct position for the file you need, instead of waiting for the tape to PLAY through to the correct position. See page 9 for how to index the position of each file on the tape.
The program automatically puts a letter in front of each filename, according to which type of file it is. These letters are: M. - music file; F. - figure file; S. - scene file; D. - movement file; and N. - a file for the number of frames in the movements file. You do not need to worry about them yourself. The program will handle them. When you need to enter the name of a file for loading or saving, just type your own part of the filename. For example, if your music file is called "WALTZ" just type that word. You must not type "M.WALTZ". You can use up to ten letters for a file name.
Remember that you can only load a file into the same section from which it was saved.
Index Sheet
| Filename | Type of File (e.g. Figure) |
| N.STREET | Number of frames in MOVE |
| D.STREET | MOVE |
| F.STREET | FIGURE |
| M.STREET | MUSIC |
| S.STREET | SCENE |
| N.CIRCUS | Number of frames in MOVE |
| D.CIRCUS | MOVE |
| F.CIRCUS | FIGURE |
| M.CIRCUS | MUSIC |
| S.CIRCUS | SCENE |
| N.DISCO | Number of frames in MOVE |
| D.DISCO | MOVE |
| F.DISCO | FIGURE |
| M.DISCO | MUSIC |
| S.DISCO | SCENE |
| N.GRAVE | Number of frames in MOVE |
| D.GRAVE | MOVE |
| F.GRAVE | FIGURE |
| M.GRAVE | MUSIC |
| S.GRAVE | SCENE |
Game Credits
(c) 1985 Applied Systems Knowlege: The Way To Learn!
Screen Designers
The following utilities are also available to allow you to edit the supplied screens of this game:
Cheats
Download
A digital version of this item can be downloaded right here at Everygamegoing (All our downloads are in .zip format).
| Download | What It Contains |
|---|---|
| A digital version of Pazazz suitable for BeebEm (PC (Windows)), PcBBC (PC (MS-DOS)), Model B Emulator (PC (Windows)) |
Report A Problem
We thank you from the bottom of our hearts if you report something wrong on our site. It's the only way we can fix any problems!
You are not currently logged in so your report will be anonymous.
Add Note
Release Country
Change the country to update it. Click outside of this pop-up to cancel.
Scan Of Selected Article
If you auction an item, it will no longer show in the regular shop section of the site.

