A&B Computing
 1st August 1985
Categories: Review: Software
Publisher: AMS
Machine: BBC Model B
Published in A&B Computing 2.08
AMX Utilities/AMX Mouse (AMS)
Last November, Applied Memory Systems Limited (AMS) launched their mouse as the alternative way of interfacing the user with a Beeb. Since then it has received rave reviews (A&B Feb 85), both for the mouse and the art software which was bundled with the package.
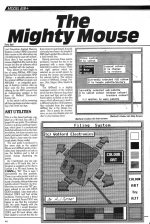
Now, before we have begun to tire of using AMX Art, AMS have launched two new packages; AMX Utilities - a valuable extension to the original AMX Art program and AMX Desk - an integrated package of desktop routines. Also we have seen the first commercial offering for the AMX mouse from an independent supplier in the form of Watford Electronics' Colour Art.
In this article I will be reviewing all three packages and also supplying a few hints and tips.
Art Utilities
This is a disc based package, supplied on a 40 track disc with a 27 page A5 user guide. The software comes in a glossy cardboard package, which gives it a professional look that will stand out on the dealers' shelves, but does not serve as a useful permanent holder. I would have liked to have seen the more usual plastic library wallet.
The user guide is produced in the same style as the original Mouse and AMX Art guides. It provides clear instructions on how to use the facilities and is full of screen dumps illustrating the points.
As I mentioned, you are supplied with a 40 track disc, but a program is supplied on the disc to convert it to 80 track format, by CHAINing "80". This is where I encountered my first problem. There is no write protect notch on the disc. Being fairly deft with with a pair of scissors, that problem was quickly solved. However, my troubles were not over as the "80" program refused to run with OPUS DDOS installed. I also tried with a Watford DDFS and had similar problems. Having found a friend with a standard Acorn DFS, I was happy to see that the converted disc ran quite happily with the OPUS DDOS. I would therefore recommend that anybody with a DDFS and 80 track drives, asks their dealer to convert the disc for them when it is purchased. It would obviously have been a lot simpler if AMS had supplied the software on a dual format disc.
Having overcome these system problems, I booted the disc to be presented with a menu display depicted by a series of icons. There are eight options which are selected, as you would expect, by moving the mouse and pressing the execute button. The options consist of AMX Art 2, Design, Pattern, Utils, Xdgen, Slide, Sketch & Strip.
The AMX Art 2 is a slightly revamped version of the original which has the infamous bug cured (see Hints and Tips, below) and an additional option included on the files menu, which allows you to load in a different selection of fill patterns.
Also included from the original AMX Art disc is the Design program. This is purely for convenience, so you can relegate your old disc to your backup store.
Pattern
Now to look at the new programs. Pattern is a very similar to the icon Design program, but tailored specifically for designing new fill patterns to be used with the Load Fills option in AMX Art 2. The program automatically loads in the original pattern set in the lower window and then you have the opportunity to load in another set in the window above. In a similar way to the icon Design program, you can drag a pattern across to the defining window by using the move button.
The pattern is then displayed with one character block for each pixel. The basic pattern character is only made up from an 8 x 8 pixel grid, unlike the icons which are 16 x 16. The defining window therefore carries a 2 x 2 Block of pattern characters. Because of this, when you alter a pixel using the execute button, four pixels will be turned on or off. To the right of the defining window is a 4 x 4 block of the pattern you are defining, so you can get a better idea of what the finished pattern will look like.
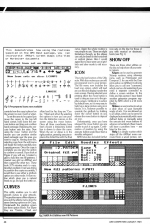
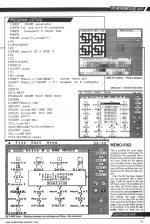
When you are happy with a new pattern, you can drag it back to the upper window display and start on a new one. Once you have defined your new set of fill patterns, these can be saved by selecting the disc drive icon. The disc also includes two additional defined pattern sets (Fig 2).
Utils
We now move on to the most exciting set of routines on the disc; the utility suite. On running the program you are presented with the Utils menu page, with a series of pull-down menus available across the top. Below this is a screen window, in the same position as in AMX Art, headed with the name of the current file and the current mode. Initially the filename is set to "Untitled" and the mode is "Menu". The software writers, Elliots, have changed the way that the pull-down menus are used.
According to the manual, this is to speed up the operation; personally, I have my doubts. To access a pull-down menu you have to move the the cursor over the menu title required and press execute. 'Nothing new' you might say, but don't let go or the menu will disappear again. Holding down the execute button, move the mouse down and the various options will invert in turn. Once you are over the desired option, release the execute button and it will be selected. You will notice on some of the menus that a number of the options are printed in grey rather than in black.
This is to indicate that these options are not currently available. If the select option requires further input (ie filename) or confirmation (i.e. clear screen) a small window will appear over the main graphics window. You are then invited to enter the required information or move the mouse over it to confirm or cancel the instructions.
In Menu mode you have the file options to load, save and name a screen (these are only available here) and quit which will take you back to the main menu. The edit options allow clearing of the screen and the goodies options give you the utilities Zoom, Copy, Curves and Icons. Having loaded in a picture created by AMX Art, you can then select one of the "goodies" (this term is pinched straight from Macpaint).
Zoom
This is the most incredible routine of the options available. On selecting Zoom from menu mode you are presented with a similar screen with your original picture intact. To the right of the main screen window is a smaller window showing part of the main screen. By moving the mouse and pressing the move button, any part of the main screen can be inset into the small window. Selecting goodies again will display a new range of options; Zoom and Showpage. On choosing the Zoom option the main screen disappears and is replaced by an enlarged version of the inset screen. Each pixel is represented by a single character block. The execute button enables you to toggle on and off the pixel under the cursor, making it so easy to add detail to your picture. Once you are happy with the results, selecting goodies allows you to show the whole page again. In fact, AMS have made this procedure even easier, as you can toggle between the edit screen and the whole page by just pressing the cancel button. Also, when in the edit screen it is possible to move the editing area by using the move button and dragging the editing area across the window.
This really is a most sophisticated utility and so simple to use. I would say it's worth buying this package just for this single routine.
Once you have finished the fine detail selecting quit from the file options menu (the only one available) takes you back to menu mode where you can save the picture or select one of the other goodies.
Copy
This is another useful utility that allows you to copy areas of the screen to another location. The goodies menu gives various options to rotate or produce a mirror image and the effects menu controls how the copy is placed on the screen (i.e. over, invert or wipe). To set the area to be copied, you move the cursor to the top left-hand corner, hold down the execute button and drag out a rubber-band rectangle. Releasing the execute button sets the area. Now using the move button and the mouse you can position similar-sized rectangle over the area you want to copy to.
Having done this, selecting Copy from the Edit Menu will begin the (rather painfully slow) copying process. Once the copy is complete, you are given the option to confirm or cancel. If you look at Figure 2, you will see I created a grid to hold the new fill patterns. I created one grid on AMX Art and then copied the other two. These took 3.75 minutes each to copy. Another problem I had was trying to position the copies accurately. I would like to see either a gridlock option or a slow mode. A nice routine which gives you a natural break to go and put the kettle on.
Curves
This utility enables you to add smooth curves to your artwork. The goodies menu offers ellipses or arcs and the effects menu gives the same drawing options as on Copy. Underneath the graphics screen are three option boxes. For Ellipse, they are *Centre, +Yrad and +Xrad and for Arc they are *Centre, +Start and +End. By selecting the options in turn, you can position the distinctive cursors on the screen using the move button.
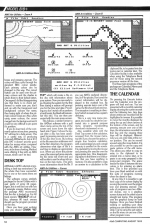
Once all three co-ordinates have been chosen a temporary dotted line is drawn to show the curve. When the arc or ellipse is in the on position, pressing execute replaces the dotted line with the final curve. Again, the whole routine is very simple to use. There are slight limitations though, as the ellipses can only be drawn in the horizontal or vertical planes. Also I would again like to have seen use of gridlock and slow mode to aid accuracy.
Icon
This is the last function of the Utils suite. With this routine you can add pre-prepared icon to your picture. The File menu now includes the load icon option, which will load an icon file and display it under the main screen. Having selected your printing effect, the move button is used to drag an icon on to the graphics screen. Gridlock is in action by default here, so it is very easy to build up a large picture using icon blocks. It is, however, possible to override the gridlock by holding down the cancel button as you release the move button to deposit an icon.
Unfortunately, once you have released the move button you are unable to pick it up again. Confirmation of position by using the execute button would have been a sensible safeguard.
AMS have also included further icon sets on the disc for those of you with musical or electronic bents (see Fig 1).
Show Off
There are three other utilities on the disc to help show off your artistic talents.
Xdgen can be used to generate Xdump routines using Sideways ROMs, such as Printmaster and Dumpout 3, for use with the User print option on AMX Art. It will only allow you to call one *command, which can be a bit restricting if you need a separate command to define a screen window. In the Hints and Tips section (below) I have listed another generator program supplied by AMS which is a bit more flexible.
Slides is a neat routine to set up a slide show of your favourite works of arts. You are allowed up to 25 slides, which can be set to be displayed automatically with a user-defined delay or manually using execute and move buttons to advance or backtrack. Basic I users will have a problem here - see later for the cure.
Strip is a simple routine which strips off the AMX Art menu surround from a saved picture, centres it up and saves it back to disc again. This is very useful if you are wanting to create a title page for your own program.
Sketch
And now for something completely different. Well, it's got nothing to do with AMX Art. AMS have included a very nice program which lets you play around with the mouse in colour. The program uses Mode 2, so eight colours are available to you. AMS have refrained from using the flashing colours. Obviously it hasn't got the same facilities as AMX Art, but they are not bad. A small selection of icons appear on the bottom of the screen allowing you to select the colours and the drawing mode. It includes rubber-band line and box drawing and circle and fill routines. You can also save to and load from disc.
Well, that completes the offering from the AMX Art Utilities package. What a wealth of facilities, especially Zoom, and well worth the £14.95! However, it is a shame, especially as a revamped AMX Art is included on the disc, that the Utils suite was not fully integrated into AMX Art. How nice it would be if you could call the routines directly without having to first save the screen, run the utilities package then load the screen back in again. Even if you want a hardcopy, it's back to AMX Art again.
But I shouldn't detract from this excellent package. A definite must for all mouse users.
Colour Art
Before I look at AMX's other package, I will cover the Watford offering as it provides another facility for AMX Art users. Colour Art provides the ability to colour in AMX Art pictures. The program is supplied on disc and comes with a nine page manual which, although short, covers all you need to know. The program is very straightforward to use and will be virtually second nature to regular mouse users.
On booting the disc, the program loads a full colour picture of the AMX mouse. In place of the icons and fill patterns of AMX Art, you have a selection of four primary colours down the side and sixteen colour shades across the bottom, with a current colour box on the end. These shades are obtained by dithering (pixel mixing) the four primary colours. The manual states that you have up to 255 shades available.
Across the top of the screen are the words "filing system". Pressing the execute over this will reveal the menu options; load, save, *command or abort. Selecting load prompts for the drive number and then the mode. AMX Art screens are Mode 4, whereas screens saved from Colour Art will be in Mode 1.
The program uses the protocol that Mode 4 screens should be in directory 4 and Mode 1 screens in directory 1. It is therefore necessary to make sure you save your AMX Art screens to directory 4 or *RENAME them before using Colour Art. If you are loading an AMX Art drawing, the program automatically converts it to Mode 1. All screens saved from Colour Art are put into directory 1 by default.
Colouring with the program is very simple. Having selected a shade from the sixteen currently available, the basic cross-hair cursor is positioned over the area you wish to fill. Pressing the execute button will fill the area with the selected colour. The fill routine is more intelligent than on AMX Art, so it is possible to colour the more open fill patterns available on AMX Art. However, it is not foolproof, and gives up at the most unexpected times. A beep is sounded when it has finished trying to fill an area or if you try to fill area that is already coloured.
As I mentioned earlier, there are more shades available than those shown in the sixteen boxes. By pointing to the current colour box and pressing execute, the full colour palette will be displayed on the screen, with your picture being temporarily saved. You then move the cursor over the new shade you want and press execute. This will transfer the shade to the current colour box. Now move to one of the sixteen shade boxes and press execute again and the colour moves to that box. In this way you can select any sixteen of the 385 shades displayed. Pressing execute over the current colour box again, will return your picture so you can continue colouring with the new shades.
If this isn't enough shades, you can also change the primary colours by moving the cursor of one of the primary colour boxes and pressing execute. The colour will then cycle through the standard BBC colour palette. Each primary colour can be changed in this way. The cancel button can be used over the primary colours and the shades to return them to their default states.
One aspect I did find disappointing was that there is no check performed to make sure you don't end up with the foreground and background colours the same, thus losing sight of where the primary colour boxes are. Also, when using some colours, the cursor merged into the background and it could be very difficult to pinpoint its position.
If you do lose track of the command options at any time, pressing "H" will load in a help screen. This is a useful way of producing coloured AMX Artwork, but at £1 plus VAT it doesn't provide good value for money when compared with the AMX Art Utilities. However, at the time of writing, Watford were offering it free with an AMX mouse, which can't be bad.
Desk Top
AMX Desk is AMS's attempt at providing a desk top environment. On the whole they have succeeded, but in one or two areas there are failings.
The software comes similarly packaged to the AMX Art Utilities, with a user guide of some 24 pages. Again, this is well laid out with lots of example screens. Before using the package, AMS recommends that the disc is backed up. For 40 track owners *BACKUP will suffice, whereas 80 track owners should use the program provide on the disc.
Once you have your working copy, you should CHAIN "SETUP" which will create a file on the disc with information about your system. Now you are ready to go. Booting the system for the first time during a session will prompt you for the time and date. Providing you don't switch off or perform a hard break, the Beeb will remember this info. You are then presented with the main menu screen.
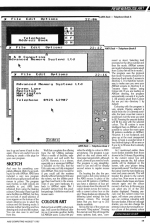
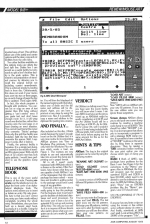
This follows a similar format to the AMX Art software with a pull-down menu across the top of the screen and icons down the right-hand side. Figure 3 shows the layout after a disc has been catalogued, by pressing execute over one of the disc drive icons. By looking at the file execution addresses and at the file's directory, the program determines what type of file it is and tries to display an appropriate icon. When you move the pointer over a filename and press execute, the filename will invert and you will be able to use the show info option on the view menu. This gives more information about the file. If you use AMS's preferred directories, (i.e. P for picture, I for icons) the correct information will be displayed in the overlaid box. By pressing execute twice over a filename, the file should load and run. The exception is anything in directory S which is reserved as a system directory.
This is a very nice menu program and could no doubt be converted into a general purpose menu program, incorporating download routines and so on.
Also available while with the Desk Top screen is the calculator, accessed from the mouse menu, top left. If you choose this option, a simple four function calculator, with a percentage key and a single memory is overlaid on the screen. It is operated by moving the mouse and pressing execute over the appropriate key. One disappointing aspect is that there is no indication that you have anything in memory. It is also possible to copy an answer to a calculation to a clipboard file, to be pasted into the memo-pad or calendar later. The Calculator facility is also available when using the Telephone Book and for those using the second processor version all the time.
The three main programs of this package are Calendar, Memo-pad and the Telephone Book.
The Calendar
On pressing the Execute button over the Calendar icon, the program will load and run. You are presented with a monthly calendar display showing the current month and the following two. Any days where entries are recorded will be highlighted in inverse. It is possible to move the months displayed by using the up and down arrows at the bottom of the screen, and by pressing execute over one of the days, the information recorded for that day and the ensuing three days will be displayed. Alternatively you can enter data at the cursor position. This can be moved around using the move button.
It is also possible to use the copy and paste options of the edit menu. This allows you either to copy an entry to the clipboard to be entered into a memo later, or to paste in an entry prepared in the memo-pad program. The space beside the date in between the two colons is for entering an alarm time. This is fine... provided you have your Beeb switched on with this suite of programs running when the alarm is due.
At any time it is possible to get a hard copy of the screen display by moving the pointer over the printer icon and pressing execute. This suite of programs uses two different dumps, one is a graphics screen dump and the other is just a straight text dump. This program uses the graphics dump on both displays.
Once you have finished reading or updating your diary entries, you can either return to the Desk Top by using the Quit option on the File menu or use one of the other program icons.
Memo-Pad
This is possibly the most disappointing program of this suite. On loading you are presented with a blank screen, apart from the standard icons. Using the file options you can either name a new document or load in an old one. Basic users will have problems here and should see the Hints And Tips section.
Once the file has been created, you are presented with a blank page with the cursor in the top left-hand corner. The facilities are very basic, but all the same, very easy to use. You can move the cursor around by using the move button in conjunction with the mouse and change the page being worked on by using the up and down arrows at the bottom of the pages. You can also define an area to be worked on by using the execute button to drag out an inverted area of text. This will then allow use of the justify and centre options and the clear, copy and cut facilities from the edit menu.
Two other facilities available on the options menu are delete line and split line. Delete line I can accept as a useful facility but who wants to split a line? Another facility is the undo option. This is meant to aid preparation of standard memos by allowing you to recall the original format not including current amendments.
This is achieved simply by loading back in from disc. Unfortunately, this does not work if your memo runs over into two or three pages, as on each change of page the disc file is updated. Think again, AMS.
In fact, this whole program is fraught with problems. You cannot cut or copy an area of text greater than 256 bytes without getting a "Can't extend" error. If you paste text and don't leave enough room for it, it will wrap round over the last line, rather than moving onto the next page or at least creating an error situation. You cannot insert text at the cursor-only overwrite. Thinks! - perhaps that's why the split line facility was included. Split the line first then overwrite the spaces. Well, I suppose it works after a fashion.
Finally, the printout facility is hopeless. It is a simple text dump, but centred in the middle of standard 80 column paper. With only 24 lines of 32 column text they look quite pathetic. I would have preferred to see the graphics dump used.
Telephone Book
This is one of the more useful aspects of the suite. Pressing execute over the telephone icon displays the front cover of an alphabetical telephone book. The options menu allows you to insert or delete an entry. My only grumble here is that you can't correct any entry you have made without completely re-writing the whole entry. Nevertheless, once you have built up a decent sized book, accessing it is a doddle. Using the execute button, first select the letter. You will then find displayed all the names beginning with that letter, select one of these and the full name and address will be displayed. Again, you can have a printout at any stage by using the printer icon. Also it is possible to copy a name and address to the clipboard for pasting into a memo.
And Finally...
Also included on this disc, (I think purely because there wasn't enough room on the AMX Art Utilities disc) is a very nice routine for incorporating AMX Art pictures into View or Wordwise Plus printouts. I have only tried the Wordwise Plus version which works a treat, see Figure 1. The routines are very simple to use and automatically take into account the dump size if printing out in paged format.
All in all, I wasn't overly impressed with AMX Desk. which is a shame as the writers, Elliot Software, have shown what they can are capable of with AMX Art. I am of the impression that this whole package has been rushed - more time and trouble in adding polish to the package would have cured most of my grumbles.
That said, I also wonder who is really going to buy this package. For the businessman it just hasn't got the facilities of dedicated databases and word processors. For the home user, it loses a lot of its potential if it's not up and running all the time. The only use I can see for it is to impress all those friends who want to know what your computer can do (or to make QL users jealous!).
Verdict
AMX Art Utilities is a definite must. Once you have seen the Zoom facility, you will know what I mean. I am sure AMX must have got the prices mixed up, as AMX Desk might be worth considering at £14.95 and the AMX Art Utilities would still be a good buy at £24.95. As for Watford's Colour Art, well I wouldn't say no if it was being included with a Mouse gratis, but I would have to think twice before paying out the same amount for this as for the AMX Art Utilities.
Hints & Tips
AMX Art: The bug in the original program can be cured by using the following routine:
*RENAME ART OLDART (Return)
*LOAD OLDART (Return)
?&1ED2=&60 (Return)
*SAVE ART 1900 4D00 1903 (Return)
To create a version of AMX Art with different fill patterns do the following:
*LOAD ART (Return)
*SAVE FILLS 4800+400 (Return)
You can now enter the Design program and load FILLS. The last eight icons are the fill patterns. Redesign your fill patterns, making sure not to alter the blank square, otherwise you will lose the rubber. Save your new patterns as FILLS2. Then:
*LOAD ART (Return)
*LOAD FILLS2 4800 (Return)
*SAVE ART2 1900 4D00 1903 (Return)
Now *ART2 will run AMX Art with your new fill patterns. If you buy the new utilities suite, you can ignore these suggestions.
Screen Dumps
AMX Art allows you to add your own screen dump routines by creating a machine code dump to run at &5000. This should be called "XDUMP". Listing 1 is a short program that allows you to incorporate a program to call a sideways ROM dump routine. It is posable to have a number of "XDUMP" routines on the same disc by filing them in separate directories. Then by issuing a *DIR command before invoking the user print option you can choose which type of dump you want.
BASIC I
Both of AMS's new packages have problems for the Basic I user. See Figure 4 for the corrections to the "Memo" program. Also in AMX Desk, the Convert program uses the pseudo-operators EQUS and EQUB in lines 810-830, which need to be altered to use the indirection operators. In AMX Art Utilities, the program "Show" has an OPENIN problem like the "Memo" program. Line 570 should read:
570 F%=OPENINA$:IF F%=0 ENDPROC
If anyone has any hints or tips on using the mouse or has written some software please do write in. And finally, somebody at AMS, can't spell. Look at lines 28076 & 28080 of the program "Tele"...
Other Reviews Of AMX Utilities For The BBC Model B
AMX Utilities (Advanced Memory Systems)
Utilities For Art
This article was converted to a web page from the following pages of A&B Computing 2.08.

