
Amstrad Computer User
 1st November 1986
Categories: Review: Software
Author: Jill Lawson
Publisher: CRL
Machine: Amstrad CPC464
Published in Amstrad Computer User #24

Recent months have seen the advent of a new batch of graphics packages for Amstrad machines, each offering a variety of new features. Jill Lawson takes a look at Melbourne Draw, The OCP Art Studio and The Image System to evaluate their strengths and weaknesses.
Melbourne Draw
Available for a while now, and based on GraphiQL which was originally written for the ill-fated Sinclair machine, this program comes with a combination of drop-down menus for the beginner, and one, two or three key-press commands for the more experienced user. This can be a little confusing in the early stages, but you'll probably soon evolve your own mixture of the two.

A rather wordy 32-page manual explains most functions fairly clearly and experience will show, for instance, when the more conveniently placed ENTER and COPY keys can be used instead of the spacebar on the CPC 464 and CPC 664 machines.
A colourful design gives way to a blank blue screen with yellow cursor in the centre when loading is completed Enter brings up the menu bar across the top of the screen, from which you can select a variety of drop-down menus listing all the functions available.
To exit a wrongly chosen menu you must either select a function or press Escape. Cursor movement is controlled with the four arrow keys, and initially the program will cheep at you if you do something right and groan if you are wrong - happily, this facility can be dispensed with.
Colours can be changed from the range available on loading, but a note should be made of these since adjustments must be made before dumping screens to a printer.
Methods of drawing range from single pixel Plot, through Point Trail, Line and rubber-banded Line (where the keypress LI and RB commands are essential for speedy work) to (rubber-banded) Circles and Boxes, and the bonus ability to draw Ellipses at a chosen angle.
The Airbrush facility is limited to a single density and there is no paintbrush selection, although the manual details a method of constructing your own brush with the aid of Texture Trail and the Colour List. A unique Zap function enables the re-colouring or deletion of continuous lines but should be used with care.
A slow but very safe Fill firstly floods any enclosed area with colour, at which stage any leakages can be spotted and repaired, and only then is the operation completed with the selection of Fill Colour or Fill Texture.
You will have noticed a couple of references to Texture, and this is where Melbourne Draw really scores. A sketchpad can be called up to overlay the lower part of the screen, without damage to the main drawing. In this area you can design anything from patterns, which can be used to fill an enclosed area on the screen, to objects such as trees, birds, animals and people. After deleting the background colour from the Colour List, these can be Planted anywhere in your picture.
Collectively, drawings created on the pad and stored for use in your picture are known as Textures. These can be saved as a separate file for future use.
With Block Remember, rectangular areas can be lifted from the main drawing and subsequently converted into textures, or Copied, Moved or Mirrored at will, and colours can be Swapped or Merged in a chosen area. Text can be added to drawings, but there is only one size and style available, unless you design your own.
If you wish, a Crib bar will detail current coordinates, colour and command and whether XOR is being used.
The default cross-hair cursor can be changed to a useful arrow shape or removed from the final picture altogether.
Unfortunately the cursor colour remains constant and may need to be changed, for instance to a dark colour when working over a light area.
There is a very small (7-pixel square) Magnify option, suitable only for the occasional accurate positioning of a single pixel, or to check for gaps in a line rather than as a regular drawing aid. I found that Moving the magnify box can produce alarming unwanted lines across the screen. Also, the 'magnify' cursor occasionally reproduces itself in technicolour at random positions on the picture, necessitating a certain amount of re-drawing.
I would suggest that you avoid using the sketch-pad and magnify together whenever possible. And try to avoid running the cursor off the lower right-hand corner of the screen since in some instances it can return with cannibalistic tendencies.
There is no straightforward way for tape users to save their pictures to, or load them from disc (or vice versa) make sure you buy the appropriate version.
A Basload program which comes with Melbourne Draw enables you to use pictures in your own programs, and three Shaded Dump programs permit dumping to Epson/Amstrad printers.
On the whole this is a fairly sophisticated drawing tool with some very attractive features. I found it a bit heavy going at first but once you are familiar with all the functions available (and the couple of things to avoid) it provides a wealth of possibilities for the imaginative artist. As the only one of these utilities to operate on the full CPC range and in all three screen modes, it must be a recommended buy for anyone looking for a good, general-purpose package.
Having tried out this utility on the Spectrum, I couldn't wait to get my hands on the updated Amstrad version The good news is that this is new completed but, and here's the sad part - at present only for the CPC 6128. I was able to borrow a machine for just long enough to get taste of what it offers - and what I saw, I liked
Formulated on the WIMP concept, almost all the information needed to use the program appears on screen in a series of drop-down menus and sub-menus.
Operation can be with joystick or mouse, but performance from the keyboard is so smooth that these are only a real benefit with the Spray Can option. It is intended to enable the absolute beginner to start drawing immediately. but I expect it. will come with a comprehensive manual too, similar to that supplied with my Speccy Studio.
At the outset you are presented with a white screen, black arrow cursor (moved with the cursor keys) and a double row of blue boxes with various menu titles from which you can pull down lists of functions.
In some cases, making a particular choice will lead to a further list or box. When a choice has been made the cursor may change to an appropriate icon indicating the nature of the current mode, but an option exists to use a cross-hair cursor as a permanent alternative.
Drawing on screen can be achieved with Pen, Brush or Spray Can. Sixteen variously shaped Pens and eight Spray patterns are built into the program, along with sixteen brushes, the shapes of which can be re-designed to your own requirements.
Filling is fast and efficient, with the option to use either solid colour or one of 32 Textures, any or all of which can be edited for your needs. Textures can be washed onto an area drawn previously to create dotted lines, fancy printing and so on.
Points, Lines, continuous Lines, Rectangles and Circles, with rubber-banding if desired, are included in the Shapes menu along with Triangles and Rays but. surprisingly, no Ellipses However, these can he produced by defining a window round a circle and stretching it with the Re-Scale facility.
A Window can be defined to include an area up to full screen size, and once specified that area within the window can be Copied, Moved, Rotated, Mirrored. or Enlarged, Reduced, Squashed and Stretched with the re-scale option. AND, OR and XOR modes may be utilised with windows and the contents may be printed without the background or other chosen inks.
Text can be added in a multiplicity of directions, sizes and styles and can be edited to produce new fonts which can be saved separately. A selection of alternative fonts is included on the disc.
The full screen is utilised for each of the excellent x2, x4 and x8 Magnify modes and each level has Scroll bars to enable work over a large area.
Even with the best programs it is possible to make mistakes, or you may just not like a particular addition to your picture. Provided that you take an immediate decision, the last operation can be aborted with the invaluable Undo. There is a very elegant File load/save and Disc Catalog facility and comprehensive options for dumping to a range of printers.
Well documented, smooth and efficient in operation and embracing all the features that you would expect to find in a contemporary drawing program, it is difficult to find anything to dislike about Art Studio. Apart from the fact that it operates only in Modes 1 and 2, it may well provide sufficient reason for CPC 464 and 664 owners to consider upgrading to a 6128.
At first sight this one seems a bit of an oddity - a new art package offering relatively few of the facilities of other programs. Drawing aids are confined to Plot, Line, Rectangle and an unusual Circle/Ellipse-producing method whereby the figure is drawn inside a chosen square or rectangle.
There is a fairly speedy and efficient Fill but if there is a leakage it can only be stopped, not aborted, so it needs to be used with great care.
It is possible to re-design Textures, for which purpose you must leave a 16 x 32 pixel area free in the top left-hand corner of the screen. However, these have the limitation that they may only be used to fill areas of a colour different to any of those used in the texture.
Add to this the fact that there is no facility for the addition of text and only Mode 0 is available and you could write this one off. Persist though, and you'll discover that while it may not be the world's greatest drawing program, it has enough interesting and ambitious features to keep you occupied for many a happy hour. And there are possibilities for producing some very effective screen displays.
If you can ignore a certain amount of confusion between the Tab and Escape keys, the manual explains clearly what can be done with The Image System. A step-by-step exercise introduces many of the commands available and how they can be used to create special effects.
The principle on which the program is based is the saving of defined areas of the screen as separate pictures, which can subsequently be recalled, re-coloured and manipulated in a variety of ways.
Suppose that you draw a leaf in four colours and save it as Picture 1. You can then clear the screen, change all four colours to blue and print it on the screen as a blue silhouette of the original.
Changing the colours back to those in the first drawing and making the background transparent, you can put the leaf back on the screen, offset slightly from the blue shape to give the effect of a shadow behind it.
Alternatively, your picture can be Moved, Rotated, Reduced, Enlarged, Stretched or Compressed in either direction, or even Twisted before being placed on the screen. And, since your one original drawing can be used an unlimited number of times in a variety of shapes and colours, you can quickly fill the screen.
When a picture is altered in shape or size, several pixel-size holes can appear in the resulting image. and depending on the style of design it may be necessary to do some repair work to produce a satisfactory result.
Up to 255 pictures of at least 2 x 2 pixels may be stored in the memory - an indicator bar shows how much has been used. As the available memory dwindles, some or all of the previously saved pictures may be Erased.
However, since the program crashed on several occasions after erasing pictures, I found a safer method was to save the screen, reload The Image System then reload the screen thereby freeing all the memory for further use. This is tedious, but better than losing several hours work.
Pictures stored in memory may also be saved as a separate file. These can be re-loaded and used to add previously drawn elements to a new picture, creating startling or amusing effects. I did find it necessary to make a separate note of picture details I had saved, and the colours in which they were drawn.
A note book is handy for listing file names, since there is no built-in catalog option and attempts to load an incorrectly named screen or picture file can return you to Basic.
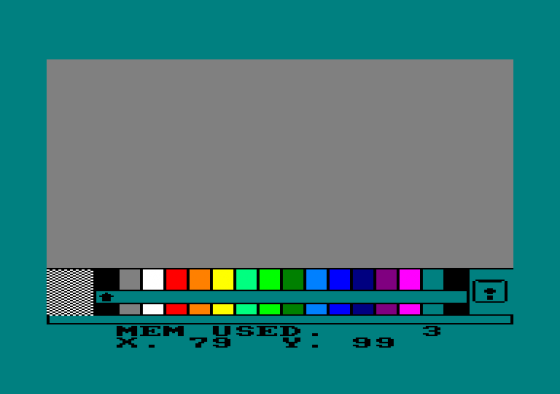
A menu bar at the foot of the screen gives details of the colour palette available, in which any of the 27 Mode 0 colours can be substituted for an existing colour. An arrow points to the current drawing colour, selected with 1-8 and SHIFT/1-8.
A lower colour band shows the colour currently chosen for parts of a picture originally drawn in the colour immediately above it, and shows a "r' on those colours chosen to be transparent when placing a picture on the screen. A message area gives information regarding current commands in use, and displays the X and Y coordinates of the cursor.
A useful optional zoom window at the right-hand end of the menu bar enables accurate plotting and facilitates texture design. The whole bar may be moved to the top of the screen or removed altogether.
The manual also has some interesting ideas regarding drawing techniques and the use of finished pictures as a basis for photography. Other suggested applications are for needlework (this is a unisex program), screen-printing, using pictures in your own programs and use of the printer dump routine.
The program does lack much of the sophistication of the previous utilities if' you are looking for a straightforward drawing tool, and I would certainly advise care with the Fill and Erase Picture commands. But I found it very easy to use and it could provide a lot of fun for the less serious user who wants to create colourful designs quickly. It has an addictive quality which I find hard to resist.
The Verdict


If you own a CPC 6128, the OCP Art Studio has everything you need for fast. problem-free production of detailed hi-res pictures. And if you can cope with Lenslok and don't mind foregoing the possibility of drawing in Mode 0, this is certainly the best value art utility available to date.
As an all-mode, all-CPC machine drawing program. Melbourne Draw has the across-the-board versatility that the others lack and incorporates several very pleasing features - a sound purchase for the average Amstrad user who is looking for maximum flexibility.
A little on the pricey side, The Image System is out of the running as a basic drawing tool. But for the production of colourful, complex low-res screen designs from a minimum of initial work, given its ability to manipulate areas of screen, this is the fun one for those with perhaps more imagination than artistic ability.
Screenshots