The Disk User
 1st December 1988
Categories: Programming: BASIC (BBC) | Programming: 6502 Assembly Language (BBC) | Tutorial: Writing Arcade Games
Author: Peter Scott
Published in The Disk User 14
Peter Scott's invaluable Game Planning series introduces sprites, colour interrupts, scrolling and screen designing.
Graphics: Sprites, Colours And Scrolling
With graphics being such a major factor in any game, they demand a lot of attention from the games programmer. Now I'll look at sprites, colour interrupts and scrolling.
Sprites
On this month's disk, there is a complete sprite routine. Last month, I discussed how to get around a few common sprite problems. This sprite routine goes one further than I suggested last month, assuming your sprite passes in front of a background that you want to preserve. Needless to say, all commercial games poke directly to the screen from machine code. This is unavoidable due to speed problems.
The dilemma comes when sprites have to move in front or behind anything. Just POKEing the data directly to the screen would leave a big black outline around the sprite. To get around this, operations are done on the data before storing it on the screen. EOR is popular and common, as the same routine can be used to both print and erase the sprite, and the background doesn't need to be stored. For example:
LDY #0
LDA (graphics),Y \ get graphics data
EOR (background),Y \ exclusive-or it with the
STA (background),Y \ background and store it
INY \ until the desired
CPY width \ "width" of sprite is
BNE loop \ printed.
The problem with this is that, when the sprite passes in front of anything, its colours change. In Mode 2, this isn't too apparent if you choose colours carefully, and redefine the flashing colours to be certain stationary ones. However, in Mode 4 or 5 as in most games nowadays, this really is insufficient with complex backdrops. The ORA operation can be used instead of EOR, but the background must be stored first, otherwise it is lost. If you use, for example, just colour 3 in screen Mode 5, then your sprite will always appear over the background. However, single colours are limiting and if your backgrounds contain colour 3, then your sprite will merge into them.
There are two ways around these problems. The first involves holding a separate mask for every sprite - very wasteful of memory. The second I've used in Thunderstruck II and in this month's program, involves a table of 256 mask bytes.
A mask is an outline which goes around the design of your sprite. Games such as Knight Lore and SpyCat uses this type of effect to allow a cartoon-like black outline around everything. The problem is obviously the amount of memory used - doubling every sprite's allocation unless many sprites share the same general outline.
The mask is held as a rectangular block with a hole in it, and the sprite fits inside it (like a key fits in a keyhole; the keyhole being the mask).
By making the mask colour 3 in Mode 5, the background is simply ANDed with it, leaving a hole where the main sprite is EORed on, with no colour corruption. There is a way to get almost all of the advantages of this effect without using a mask for every sprite.
Yes, you use another table, just like using a reverse table! The only limit this places on your sprite is that it must be in one less than the number of colours available in the Mode, meaning proper masks must really be used in Mode 4. My sprite routine on the disk (CHAIN"SPRITE") uses Mode 5. It allows you three colours for your sprite, and I suggest you use one of them as an outline. The demo program defines a sprite with a black outline. The sprite passes in front of anything without corruption. The method used is described below:
LDY #0
LDA (graphics),Y \ load sprite
TAX \ transfer it
LDA (background),Y \ load the background
AND masktable,X \ AND it with the mask table
ORA (graphics),Y \ OR it with the background
STA (background),Y \ store it on the screen
INY \ repeat until
CPY width \ at the right sprite width
BNE loop
Now, all that needs to be done is to store all the background before printing the sprite and the routine on this month's disk is done. In practice, you'll need to cater for different sprite widths and depths, but that is a fairly simple modification. This routine also only works on character-sized jumps on the vertical plane, but that can be worked around by designing your sprites carefully so each frame of vertically moving sprites is four pixels above the other, creating smoother movement. Horizontally, the sprites move in four pixel jumps. Anything else is impractical in Mode 5, and this again can be worked around by designing each frame of animation a couple of pixels ahead of the last.
Colour Interrupts
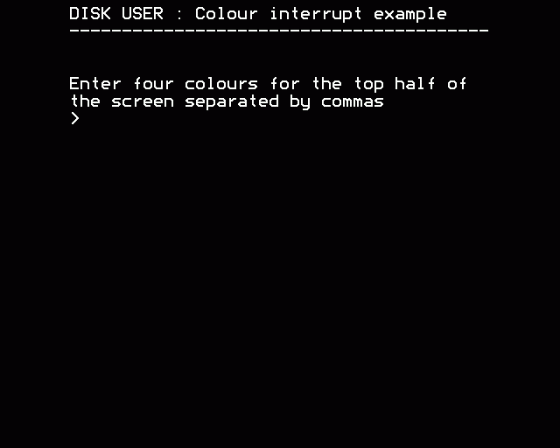
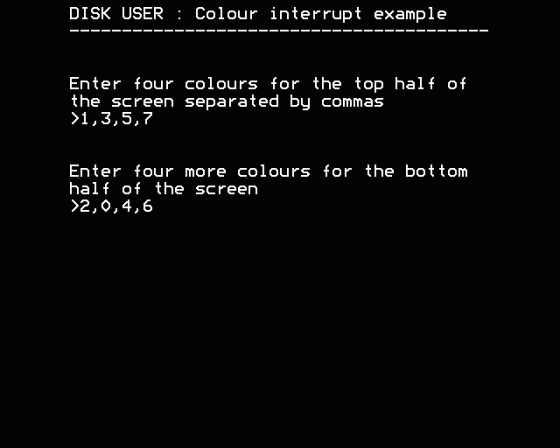
Also on this month's disk is a colour interrupt routine. This is again for Mode 5, but it can be used in any Mode with minor modifications. The Advanced User Guide explains all the theory, but I'll try and dilute it to what is relevant. (The Advanced User Guide is a necessity to any serious programmer of the BBC, and if you don't own one, you should!))
To allow more colours to be available in a Mode, you simply change the palette when the raster scan that builds the picture up is someway down the screen. If this is done every fiftieth of a second, via interrupts, the screen will have more than the number of colours that are supposedly available.
More than one change of palette can be used to create even more colourful effects, but this example is easier to follow and sufficient for most games The program (CHAIN"D.COLINTR" to run) contains plenty of comments to illustrate what is going on but this also disguises the basic simplicity of what you'll need to incorporate it into your own programs. The table below is the table set up in the program:
| Logical colour | Values |
| 0 | 0,16,64,80 |
| 1 | 32,48,96,112 |
| 2 | 128,144,192,208 |
| 3 | 160,176,224,240 |
In Mode 5, you must define each logical colour four times, once with each value from the table. To the table value, you add the physical colour you want, EORred with 7. So, to redefine colour 3 to be blue (number added on = blue EOR 7 = 4 EOR 7 = 3), you'd store 160 + 3, 176 + 3, 224 + 3 and 240 over &FE21 at the right time (as in the program supplied). Most of the complex-looking BASIC simply works out these numbers and stores them in the right place, ready for the interrupt routine to use.
I'd advise that you leave at least one of the colours unchanged between the upper and lower sections of the screen, and a gap of a few pixel lines of this colour, to stop the slight juddering of the interrupt. It may only seem practical to use this type of method for a differently coloured status display on the screen, but this isn't so. By using frequent changes of one colour, making sure the controllable character doesn't contain that colour and the characters that do don't cross the interrupt, you can have many colours in your game.
Scrolling
This is one of the hardest parts of any BBC Micro game to get right. In theory, the BBC has excellent hardware scrolling facilities. In practice, they are none too easy to use without flicker, judder and generally poor screen displays. Hardware scrolling allows movement by character increments up and down, and by eight byte chunks left and right. In the two colour Modes, this is one character. In Modes 1 and 5, this is half a character, and in Mode 2, this is a quarter of a character (two pixels). This makes smoothness difficult, and the absolute nature of the feature means sprites have to be erased and reprinted, causing flicker in many cases.
There are exceptions to the poor scrolling rule. Codename: Droid has probably the best "normal" all-way scrolling on any BBC game, reasonably smooth and, more importantly, fitting in with the game perfectly. And, if I may say so, my own Ransack was rather fast and smooth, especially considering it used a software scroll, described later on.
Of all BBC games, Firetrack stands out. Its scrolling would be good on a Commodore 64, and disgraces most Atari ST games. It is done very cleverly. When you change the screen's vertical position (using VDU 23;7 or *TV) you may have noticed how the screen wobbles up and down for an instant. By controlling that, using black colour interrupts at the screen edges (which will remain stationary during the "wobble") and a hardware scroll every so often, and timing the whole thing very carefully, pixel-by-pixel scrolling is possible.
The timing is crucial, and the whole thing is very difficult to program, which is why it took someone like Orlando (writer of Zalaga and Frak) to exploit it first.
Here we come across the biggest problem with hardware scrolling: the Electron. The Electron can only hardware scroll by 64 byte blocks, not the eight bytes that the BBC can. This makes sideways scrolling impractical, although games like my old friend Gary Partis' Syncron exploit the fact that up/down scrolling can be done easily enough. In fact, Electron Syncron scrolls faster than the BBC one!
On the other hand, software scrolling works on both machines, if somewhat slower on the Electron (see Psycastria on both machines for an illustration of software versus hardware).
Virtually all software scrolling games only move parts of the screen, be they windows with fancy panels on the sides or just parts of the actual play area. In my list of games with excellent hardware scrolling, you may be surprised by the omission of Superior's Bonecruncher. This is because it uses software scrolling, plus another technique: using two screens.
This involves holding two copies of the screen, and software scrolling the second copy, rubbing out all the sprites and moving them. This happens out of view, and once all movement is completed, the address of the start of the screen is altered to the newly scrolled one. This gives very smooth scrolling. It may be a little slower than the Repton games, but much improved with no flicker or judder. It can also be used with little modifications on the Electron.
The cost in memory is huge though, doubling the amount of memory taken up by the screen. A 20 line Mode 5 screen takes up 12.5K and a similar Mode 1 or 2 screen would take up 25K! This makes this technique only applicable if your game takes up little memory. Any sprite routine in a scrolling game has to take account of what is being scrolled and where. You'll find it very difficult to move more than three or four sprites without flickering if you use hardware scrolling. Ransack had somewhat blurred, if not flickery, sprites due to trying to do too much each iteration.
General Graphics Information
So you have a pretty screen, complete with colour interrupts, a sprite routine to move things around with and a scrolling routine to make a landscape go by. How do you go about designing impressive-looking graphics to go with them? First of all, try and have a definite theme. It could be futuristic or medieval, a house or a castle, pipes and tubes or trees and grass. A simple theme for your graphics to conform to. For variety's sake, try and have several themes for different parts of a game.
In a shoot-'em-up, the first level could be in space, the second could be on the outside of a huge spaceship and the third inside it. In an arcade adventure such as Thunderstruck II, there were several areas such as inside a futuristic complex, under it in caverns, outside it with a lunar landscape, power areas full of pipes and tubes, computer areas full of monitors and flashing lights and so on. Try and get some idea of light and shadow. Uridium is very effective because of its metallic look (creating a host of imitators using this effect).
It is very simple to create metallic (or bas-relief) graphics. Draw a shape in a medium colour (like cyan, green or magenta), use a bright colour for the top and right edges (yellow or white) and a dark colour for the bottom and left edges (blue, red or black). All "sticking out" parts should have a bright top and right while all recessed parts should reverse the edge colours. Playing around with metallic graphics leads to a futuristic-looking, hi-tech atmosphere.
Having some idea where the light is coming from helps in all graphic design. Shadows create depth and atmosphere, and being simple black shapes, they are easy to design, not demanding too many colours, just a little care. For more complex structures, sketch on paper what you want first. You needn't be a great artist, just get the right general dimensions and shape. On your graphic designer, draw an outline that you can erase later on, and design within that framework. My sprite designer has a grid function built in which is useful for transferring graphics from paper to a computer screen.
If you have a photograph, picture or sketch that you want to transfer to your game, draw a grid around it and have that same proportion of grid on the screen when you design it. This makes it much easier to copy the picture, block by block of the grid.
Don't be too afraid of copying graphics from other games. As long as you don't copy whole chunks of a game, changing slightly what you copy (improving it hopefully!), you shouldn't get into any deep trouble.
Obviously, being original is better, but there is nothing wrong in getting your inspiration from other people's work. If you must copy graphics from other games, copy from machines other than the BBC and Electron. This is where all the magazines with pictures of other computer's games come in handy! It's interesting to note what BBC games were "inspired" by other machines' games. The much revered Repton is an extension of Boulderdash (its main character is called Rockford) which was released only recently on the BBC, but has been around on the Commodore 64 for many years. The gameplay is incredibly similar, although Repton has much bigger and better graphics.
I also find it interesting to see a few of my own original ideas and graphics turning up in games on other machines in one form or another. A certain Mastertronic Spectrum game featured a spaceman in a castle, a lift, puzzles and around 100 screens. I wonder if the author ever played Thunderstruck, with a spaceman in a castle, a lift...
In general, you need to write a corking game to get away with poor graphics. Nowadays, fewer games with unimpressive graphics reach the market. Something like Tetris or Impact, both with simple and addictive gameplay but fairly poor graphics, are exceptions, but standards improve every few months.
Graphic Screen Designer
Load and run with *GRAPHIC.
You basically design half a mode 5 screen.
The large yellow block is the main cursor.
Main Controls
Z - Left, X - Right, : - Up, ? - Down
G - Draws character grid (G again to get rid of it)
L - Load in data (see S - Save data later)
SPACE - Zoom in
The zoom in feature will allow you to design the area covered by the cursor in more detail in the bottom half of the screen.
When zoomed in:
Z - Left, X - Right, : - Up, ? - Down
RETURN - "Colour in" pixel
0/1/2/3 - Set colour to this logical colour
SPACE - Zoom out again
You can load in screens larger than the window you design them on, and save them again.
L - Load: This asks you for a start address in hex. The default is the top of a Mode 5 screen (&5800). You can load in before (but must be above &4000) or below this address - just enter the number.
S - Save: To save a screen, you must enter the length first in hex. Enter 1400 for the default screen size. If you've loaded in data before &5800, you should obviously add to this. Then you'll be asked where you want the data to download to (again in hex). &5800 is the usual address for a screen.
This program is a BASIC file with a piece of machine code tacked onto the start to run it. Set PAGE to &1900 and *LOAD it to see the BASIC. This will allow you to change the default colours, key repeat rates, etc.
Next Issue
Cramming in as much of anything as possible, tips for different types of games.
Editor's Note
Although this is the final issue of Disk User, we hope to continue the Gameplan Series in our new disk mag, Fast Access.
This article was converted to a web page from the following pages of The Disk User 14.

